
Converting walls to carbon caches could be compelling when you consider just how much wall space there is in the average US home. Shifting from a high embodied carbon material such as drywall, to a carbon storing material could create a colossal carbon sink opportunity while also reducing current emissions from manufacturing materials such as drywall and making homes generally healthier at the same time.
The vast majority of inside walls in the US are covered using drywall (also called plaster board or wallboard), which is largely made from gypsum. The average American home, which is now close to 2,500 sf contains roughly 11,225sf of wall space. A typical US home might therefore have 15,000+ lbs of drywall. The environmental impacts of mining, transporting and end of life for 15M tons of wallboard produced per year are enormous. Though it is recyclable, most of it heads to a landfill where it proceeds to off-gas sulfur dioxide, nitrous oxide (though this is also called laughing gas it is no laughing matter as it is a potent GHG), carbon monoxide and odors that you do not want to be smelling!
Covering walls with carbon storing materials is not new. Wood has long been used in many cultures, though it has fallen out of favor with many builders and homeowners. More recently we are seeing other carbon storage materials such as straw board or hemp begin to emerge.
One of the parameters for building my drawdown dwelling was to avoid drywall to the maximum extent possible and to utilize a variety of carbon storing materials instead. The exterior walls are built using straw bales – it took less than 2 acres roughly half a year to grow my walls – plus lumber of various flavors; dimensional, composite, etc. Interior walls (window sills and floors too) have been covered with rescued wood from barns and fences as well as locally and regionally harvested ash, cherry, maple and pine – a veritable forest or at least the ghosts thereof. All were sustainably harvested and putting them inside homes is a sure fired way to prevent the carbon absorbed during the tree’s lifetime from converting back into CO2 for as long as the house shall live!
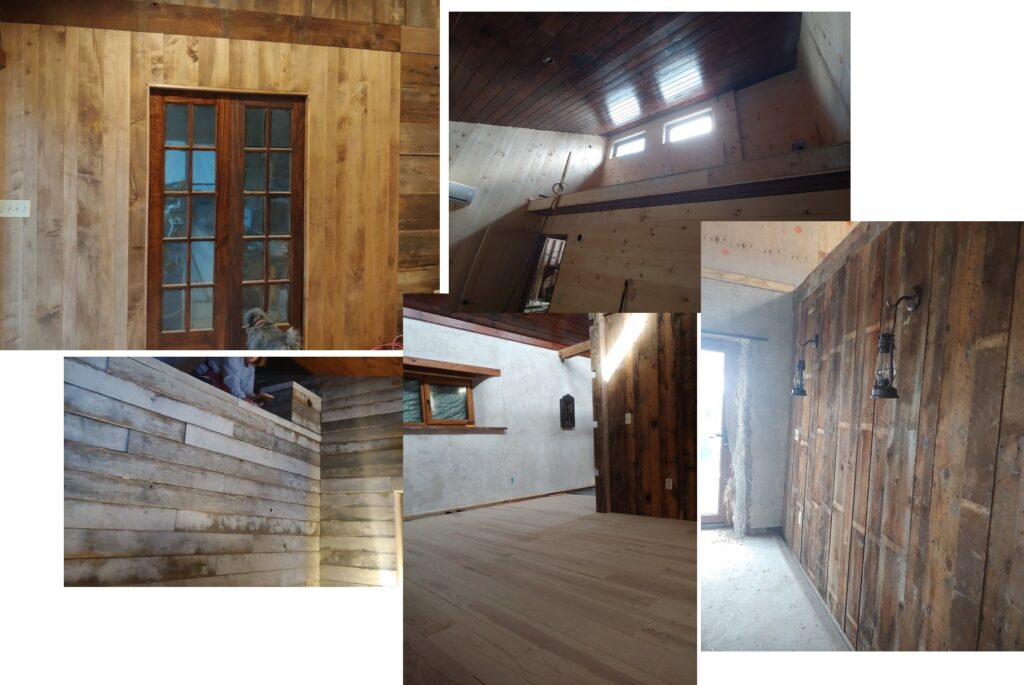
From top left: maple, pine on ceiling & walls; lower: rescued fence boards and barn wood
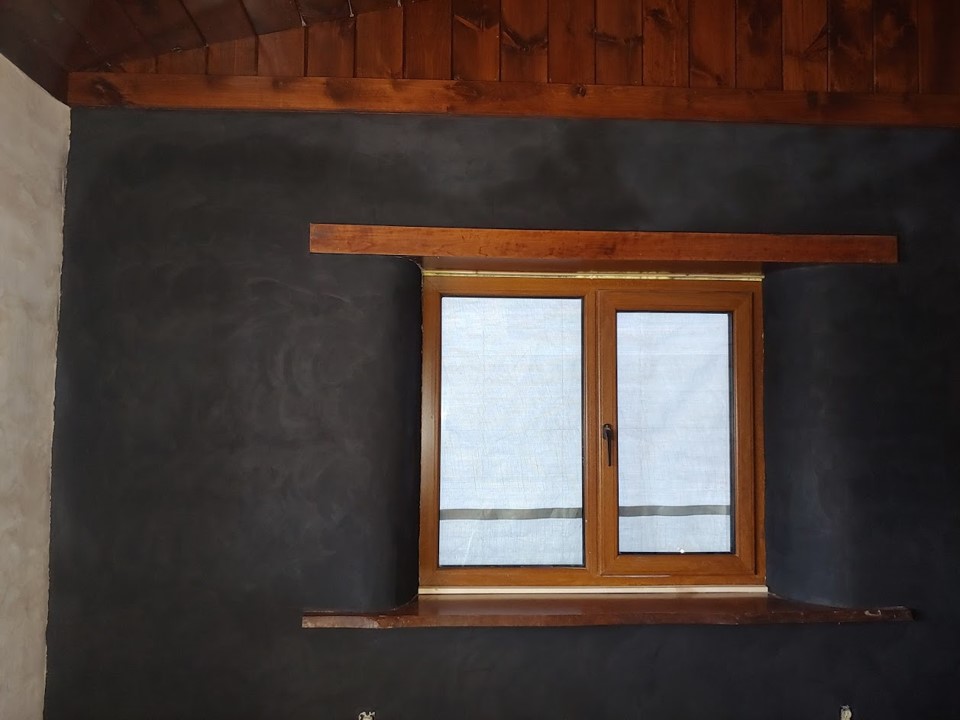
As I am in the biochar world, I really wanted to have a biochar plaster wall similar to the one done at the Ithaka Institute headquarters in Switzerland. I procrastinated until all other interior walls were done which allowed me to get more comfortable with plastering in general. Now after two days of burnishing (i.e. rubbing walls gently with a mildly wet sponge to smooth lines, heal cracks and remove surface particles), the plaster is thankfully still on the wall and, all modesty aside, looks gorgeous (except for the tarps on the windows and the not completely finished window trim). Although originally I thought this was beyond my abilities, this is a project anyone can do but for those fastidious few, I warn you it is dirty to do (but pretty to view!).
Before taking the plunge, my co-conspirator and plaster master, Jill and I did some testing using different sized biochar, both of which came from Aries Clean Technology (Many Thanks Nancy at Aries!). Aries makes biochar from urban wood waste in Tennessee, and I knew they produce an IBI certified, very fine powdery size (2 – 300 microns) biochar that I’d wanted to test in plaster. They also had a chunkier size (<1/8”) which was worth exploring. Using the same recipe [50/30/20 v/v biochar, sand, clay] results in very different colors and textures which you can see in Figure 1.

The oatmeal version took quite a while longer to dry than the frosting. In speaking with my colleague who pioneered this technique in Switzerland, he advised that the chunkier plaster can be used as a base coat to increase insulation and the finer biochar plaster makes a nice finish coat. Alas I already had a base coat, so decided to move along with the blacker finish coat. [For those that don’t fancy black walls, you can cover it using clay paint which comes in a variety of colors.]
We premeasured each ingredient and added them dry into a large bin before adding water. In hindsight, I would recommend wetting the biochar and/or clay beforehand to reduce dust while blending (kind of like slaking lime).
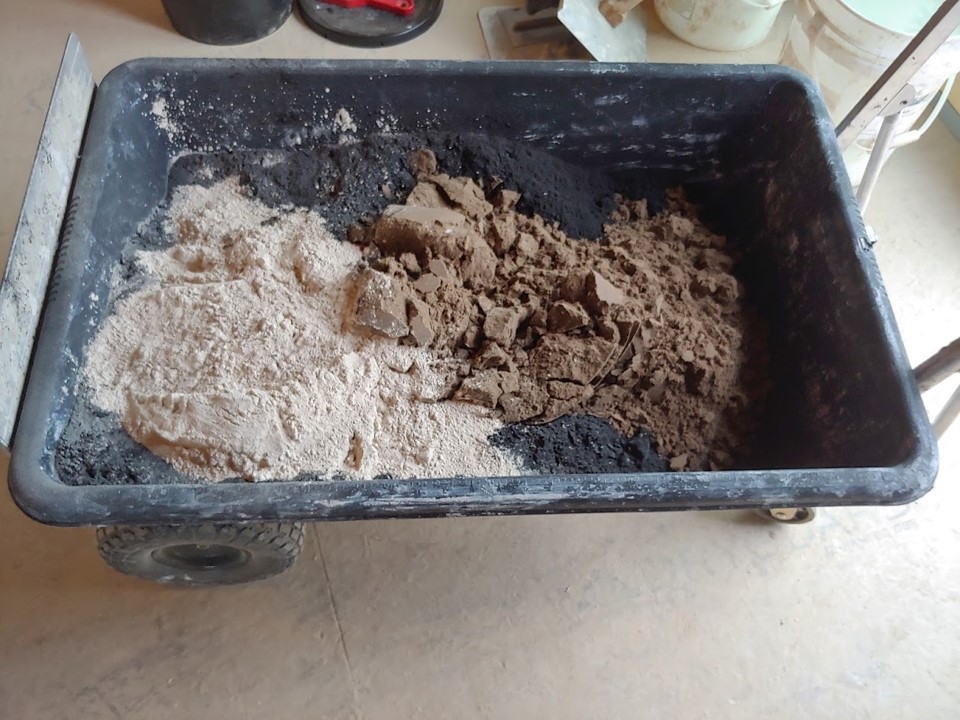
We started with a 5 gallon bucket of Aries Green Tech powdery biochar, plus the requisite amount of sand and clay. We used roughly 3 gallons of water to get it into something just a bit heavier than frosting. This took quite a lot of time with a drill and paddle mixer to get to the right consistency and make sure everything was well blended. (If you are doing a bigger wall it would be easier to use a hydraulic mixer.) I recommend doing this outside as there is a certain amount of splattering and in the beginning some of the particulate matter does get airborne. This ended up being not quite enough to cover a 80 – 90 square foot all, so we made up another smaller batch in a 5 gallon bucket.
All in all, there is likely about 10 lbs of carbon (the Aries powdery char has 85% carbon) or about 36 lbs of CO2e; not a huge amount, but it was a very thin layer (1/8” – ¼”) and a pretty small wall!
Now let’s do some carbon math. Say this thin layer contains about .1 lb of carbon per sf (.367 lbs CO2e). That could easily be doubled or tripled as the average drywall width is 1/2″. Now imagine putting that on a majority of the 11,225sf of wall space in each home. Now multiply that by the nearly 1 million new homes built each year. That is big C storage opportunity with multiple side benefits. Those are the (C) walls we need to start building!

Side note: doing this type of project turns many a sponge and all clean up water very, very black. Knowing that the black comes from biochar means that tossing the black water out onto the soil or down the drain puts a guilt-free smile on my face knowing that it will enrich the soil and septic system!
